Showing posts with label Die-cuts. Show all posts

Saturday, July 5, 2014

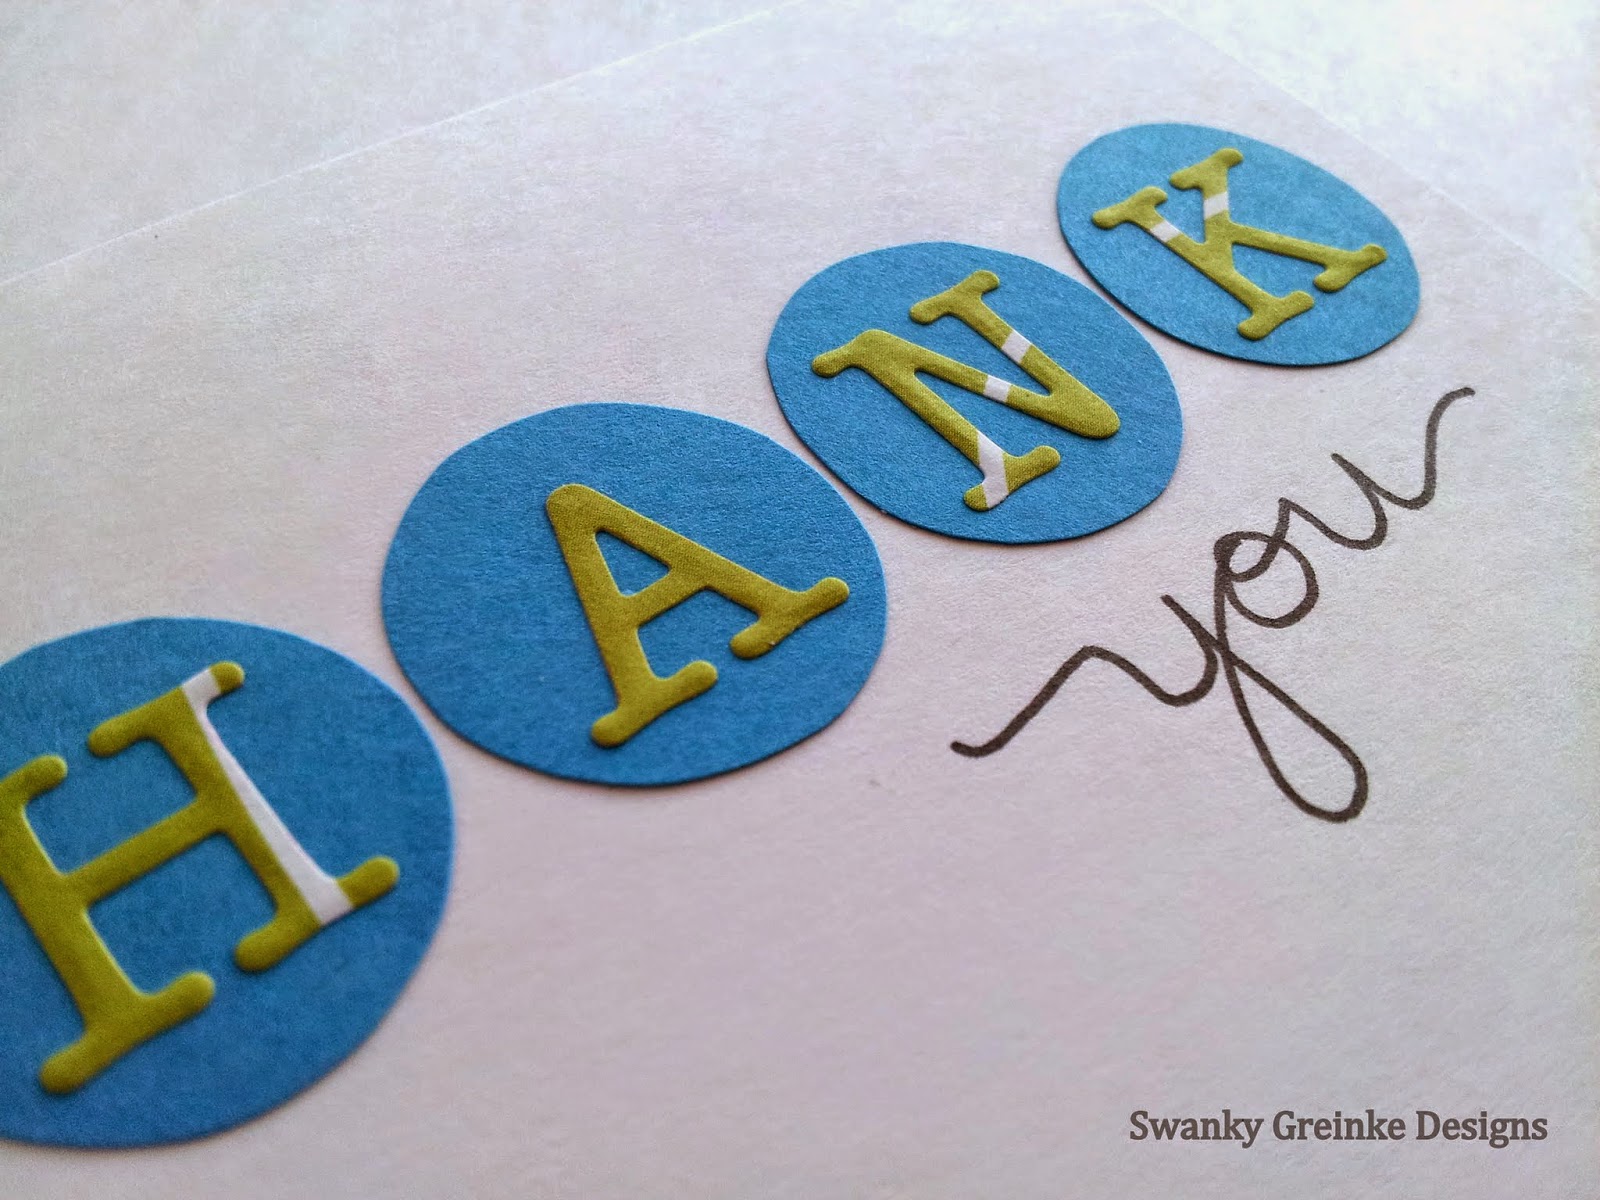
Die Cut 'Thank you' in Circles

As promised, here are the cards that I created using the letters that were cut out from yesterday's project. I had originally place the letters directly onto the cardstock, but it seem so flat and uninteresting. So I decided to place each letter in a circle and now I have a simple, yet finished looked. You may have noticed that the "s" is missing and that is because it would have been too wide to fit on a standard A2 card. The "you" is handwritten in black ink. As for the missing "s"'s I will save them for some monogram stationery for my mother. Waste not!


Materials: White, light gray, colored cardstock, Hero Arts Uppercase Alphabet die, permanent black pen.
Size: Standard A2 4.25" x 5.5"

Thanks for stopping by!
Jessica

Disclosures:
I use the craft products that I like to use. I am not paid by anyone or any entity for marketing of the various products that I may mention on this blog.

If you like what you see, I invite you to follow my blog or visit me on my pinterest or Etsy sites! Links can be found on the right-hand side of the screen.

Friday, July 4, 2014

'Thanks' Die-cut with Stitching

Similar to some cards that I have made in the past, these cards were created using a steel alphabet die. To get the letters straight, I taped the letter dies together and cut out the sentiment in one shot. I saved the lettes that were cut out of this paper and will show cards created with them in tomorrows post. After I ran the paper through the die cut machine, I adhered to to a card base and used zigzag stitching to add some texture.


Materials: White cardstock, patterned paper, Hero Arts Uppercase Alphabet die, sewing machine
Size: Standard A2 4.25" x 5.5"

Thanks for stopping by!
Jessica

Disclosures:
I use the craft products that I like to use. I am not paid by anyone or any entity for marketing of the various products that I may mention on this blog.

If you like what you see, I invite you to follow my blog or visit me on my pinterest or Etsy sites! Links can be found on the right-hand side of the screen.

Thursday, June 26, 2014

Vellum Love with Gold Thread

Simple cards are my absolute favorite. I'm always looking for ways to add a little pizazz without going overboard. My local craft store was having a sale on thread, so I splurged and bought some metallic thread. (holy cow is it expensive at regular price!) So I decided to let the metallic thread spark some interest in an otherwise relatively flat card. It works to keep the vellum in place, and also brings your attention to the word love (as it runs right through the middle).

The glitter square was created with double-sded adhesive and white glitter. (I always cut out a template square and temporarily adhere it to my card front so that my lines are straight.)


Materials: Kraft cardstock, white glitter, 0.25" wide double-sided adhesive, vellum, Hero Arts Uppercase Alphabet die, gold thread, Fiskars corner edger.
Size: Standard A2 4.25" x 5.5"

Thanks for stopping by!
Jessica

Disclosures:
I use the craft products that I like to use. I am not paid by anyone or any entity for marketing of the various products that I may mention on this blog.

If you like what you see, I invite you to follow my blog or visit me on my pinterest or Etsy sites! Just see the right-hand side of the screen!

Friday, June 6, 2014

Happy Happy Birthday Card

On this card, I used a direct-to-paper technique with dark pink ink and white ink on hot pink paper with some die cut alphas. The "birthday" is hand-written in black gel pen. 


Materials: Hero Arts Uppercase, white cardstock, pink and white pigment ink pads, black gel pen
Size: Standard A2 card 4 1/4" x 5 1/2"

Thanks for stopping by!
Jessica

Disclosures:
I use the craft products that I like to use. I am not paid by anyone or any entity for marketing of the various products that I may mention on this blog.

If you like what you see, I invite you to follow my blog or visit me on my pinterest or Etsy sites! Just see the right-hand side of the screen!

Thursday, June 5, 2014

Die Cut Monogram

Here are some simple cards using both of the alphabet dies that I own and some specialty cardstock.


Materials: MFT by the letters, Hero Arts Uppercase, white cardstock, foam dimensional, specialty cardstock
Size: Standard A2 card 4 1/4" x 5 1/2"

Thanks for stopping by!
Jessica

Disclosures:
I use the craft products that I like to use. I am not paid by anyone or any entity for marketing of the various products that I may mention on this blog.

If you like what you see, I invite you to follow my blog or visit me on my pinterest or Etsy sites! Just see the right-hand side of the screen!

Wednesday, June 4, 2014

Embossed Thank You

Here is another way that you can get the most of your die cuts. Cut out several of the same design and then glue them all together. For my project, I used 5 layers of 110 lb. Georgia Pacific cardstock. Looking back, I may have gotten better results if I had only used like 3 layers. After the 5 layers, the impression wasn't very crisp. So, I used an empty ball point pen to better outline the letters, turns that I was unable to make things really crisp and clean (I've never tried "hand-embossing" before so I'm not sure if it was just me, or it's just not feasible to make it look nice and neat) Either way, even though the effect is not what I was going for, I like it. It reminds me of greenware or a rough clay model.


Materials: MFT by the letters, white cardstock
Size: Standard A2 card 4 1/4" x 5 1/2"

Thanks for stopping by!
Jessica

Disclosures:
I use the craft products that I like to use. I am not paid by anyone or any entity for marketing of the various products that I may mention on this blog.


Wednesday, May 28, 2014

Debossed Thank you

Alphabet steel dies can be expensive. That's why I'm always trying to get the most of out them. Here is another way that you can use steel dies - emboss with them. To get this effect, you have to work with your machine a little bit to find the perfect thickness. I have a cuttlebug, but you could use any of the die-cutting/embossing machines. I first put down an A plate, then a B plate, then some layers of old Tshirt scraps, then my paper that I wanted embossed, then the steel dies, then another B plate. I used cotton letterpress paper as it tends to emboss beautifully; see for yourself!


Specifications:
Materials: Sturdy white cardstock MFT steel die - Die-namics by the Letters
Size: Standard A2 size (4.25" x 5.5")

Thanks for stopping by!
Jessica

Disclosures:
I use the craft products that I like to use. I am not paid by anyone or any entity for marketing of the various products that I may mention on this blog.

If you like what you see, I invite you to follow my blog or visit me on my pinterest or Etsy sites! Just see the right-hand side of the screen!


Monday, May 19, 2014

Blue Stripes, Yellow Flowers

Just a simple card today: ocean blue cardstock and some two-toned yellow flowers, throw in a little bling there you have it.


Materials: Colored cardstock, rhinestones (actually taken off a pair of flip-flops after they bit the dust.) Fiskars small flower punch.
Size: Standard A2 card 4 1/4" x 5 1/2"

Thanks for stopping by!
Jessica

Disclosures:
I use the craft products that I like to use. I am not paid by anyone or any entity for marketing of the various products that I may mention on this blog.

If you like what you see, I invite you to follow my blog or visit me on my pinterest or Etsy sites! Just see the right-hand side of the screen!

Monday, May 12, 2014

Scraps Thank You

Scraps, scraps, scraps. I am ALWAYS looking for ways to use 'em. It's a losing battle, I'll admit it (I feel like I'm always creating more scraps no matter how many "scrap cards" I may make), but at least it's a great crafter's challenge! Here is a card that I created using lots of paper strips to essentially create my own patterned paper. It's a great way to get just the right colors that you want and (of course) to use up those scraps. I decided to overlap the sentiment and make it a little crooked because I needed to offset the straightness of the stripes for visual appeal.


Materials:
White cardstock, paper scraps in assorted colors/patterns, MFT die-namics by the letters
Size: Standard A2 card 4 1/4" x 5 1/2"

Thanks for stopping by!
Jessica

Disclosures:
I use the craft products that I like to use. I am not paid by anyone or any entity for marketing of the various products that I may mention on this blog.

If you like what you see, I invite you to follow my blog or visit me on my pinterest or Etsy sites! Just see the right-hand side of the screen!

Thursday, May 8, 2014

Ombre Thanks

Oh look, ocean blue cardstock! (Nope, I'm never going to stop pointing it out.) These were created with same steel dies that I have used in the last several posts, but this time, I used the technique where you position your cutting plates in such a way that you leave the bottom of the letters intact. Before cutting, I used Bic alcohol-based markers to create an ombre effect on white cardstock. I don't own any Copics (because they are about $6 per marker if you're keeping track), but I assume they blend better than Bics. That being said, I do like the Bics because you get a lot of bang for you buck! Also, I like the imperfect look on handmade cards.


Materials: White cardstock, colored cardstock, MFT die-namics by the letters, Alcohol-based markers
Size: Card is just shy of standard A1 or 4bar card size 4 3/4" x 3 1/4". Envelope is the standard A1/4bar size of 5 1/8" x 3 5/8"

Thanks for stopping by!
Jessica

Disclosures:
I use the craft products that I like to use. I am not paid by anyone or any entity for marketing of the various products that I may mention on this blog.

If you like what you see, I invite you to follow my blog or visit me on my pinterest or Etsy sites! Just see the right-hand side of the screen!

Wednesday, May 7, 2014

Die Cut Thank You

Hello and welcome! I had made these thank you cards ages ago, but had never gotten around to posting them! These are simple "thanks" cards that were created with white cardstock, patterned paper, and a craft die. To give the cards dimension, the white panel is popped up with 1/8 foam dimensional.


Double-sided adhesive foam dimensional is relatively inexpensive, but this card does use a lot of it. To help offset the cost a bit, I bought a large pack of fun foam that I just cut to the size that I need. You can get a pack that will last a lifetime for about $5. This method does require liquid glue and a little more time and patience, but it's what works for me. I did use the self-adhesive foam for the small pieces, because liquid glue can be quite messy if not done "just so".

Specifications:
Materials: Sturdy white cardstock, patterned paper, foam dimensionals, MFT steel die - Die-namics by the Letters
Size: Card is just shy of standard A1 or 4bar card size 4 3/4" x 3 1/4". Envelope is the standard A1/4bar size of 5 1/8" x 3 5/8"

Thanks for stopping by!
Jessica

Disclosures:
I use the craft products that I like to use. I am not paid by anyone or any entity for marketing of the various products that I may mention on this blog.

If you like what you see, I invite you to follow my blog or visit me on my pinterest or Etsy sites! Just see the right-hand side of the screen!


Saturday, May 3, 2014

Glitter Thank You

Hello and welcome! Don't you just love glitter! So many sparkles and bold colors makes my heart happy. Here are a few cards that are full of happy! These were created with an alphabet die cut, white cardstock, liquid glue, and of course, glitter!


Make sure that whatever paper your're adhering the glitter to is a similar color to the glitter you're using. I used white letters and colored glitter, but the edges were not clean at all and it looked, well, terrible! I had to go back in with a Bic marker to the white cardstock to make the edges cleaner. It would have been easier and prettier if I had used color cardstock in a similar to color to the glitter to start off with!

Materials: White cardstock, glitter, liquid glue, colored cardstock (same color as glitter), MFT die-namics by the letters.

Thanks for stopping by!
Jessica

Disclosures:
I use the craft products that I like to use. I am not paid by anyone or any entity for marketing of the various products that I may mention on this blog.

If you like what you see, I invite you to follow my blog or visit me on my pinterest or Etsy sites! Just see the right-hand side of the screen!